Court Booking
Club pros and staff can manage court bookings with ease, streamlining reservations, availability tracking, and member scheduling all in one place.
Setup: Creating a Court
1. Create a Court Type
Navigate to the “Court Type” tab of your Clubspot account and click on the + icon at the top of the page. Enter the name (and any price) of the court type and set the type of the product to “Reservable item”. If you already have a reservable product set up for your court and would like it converted to appear on the Courts dashboard, please let us know!
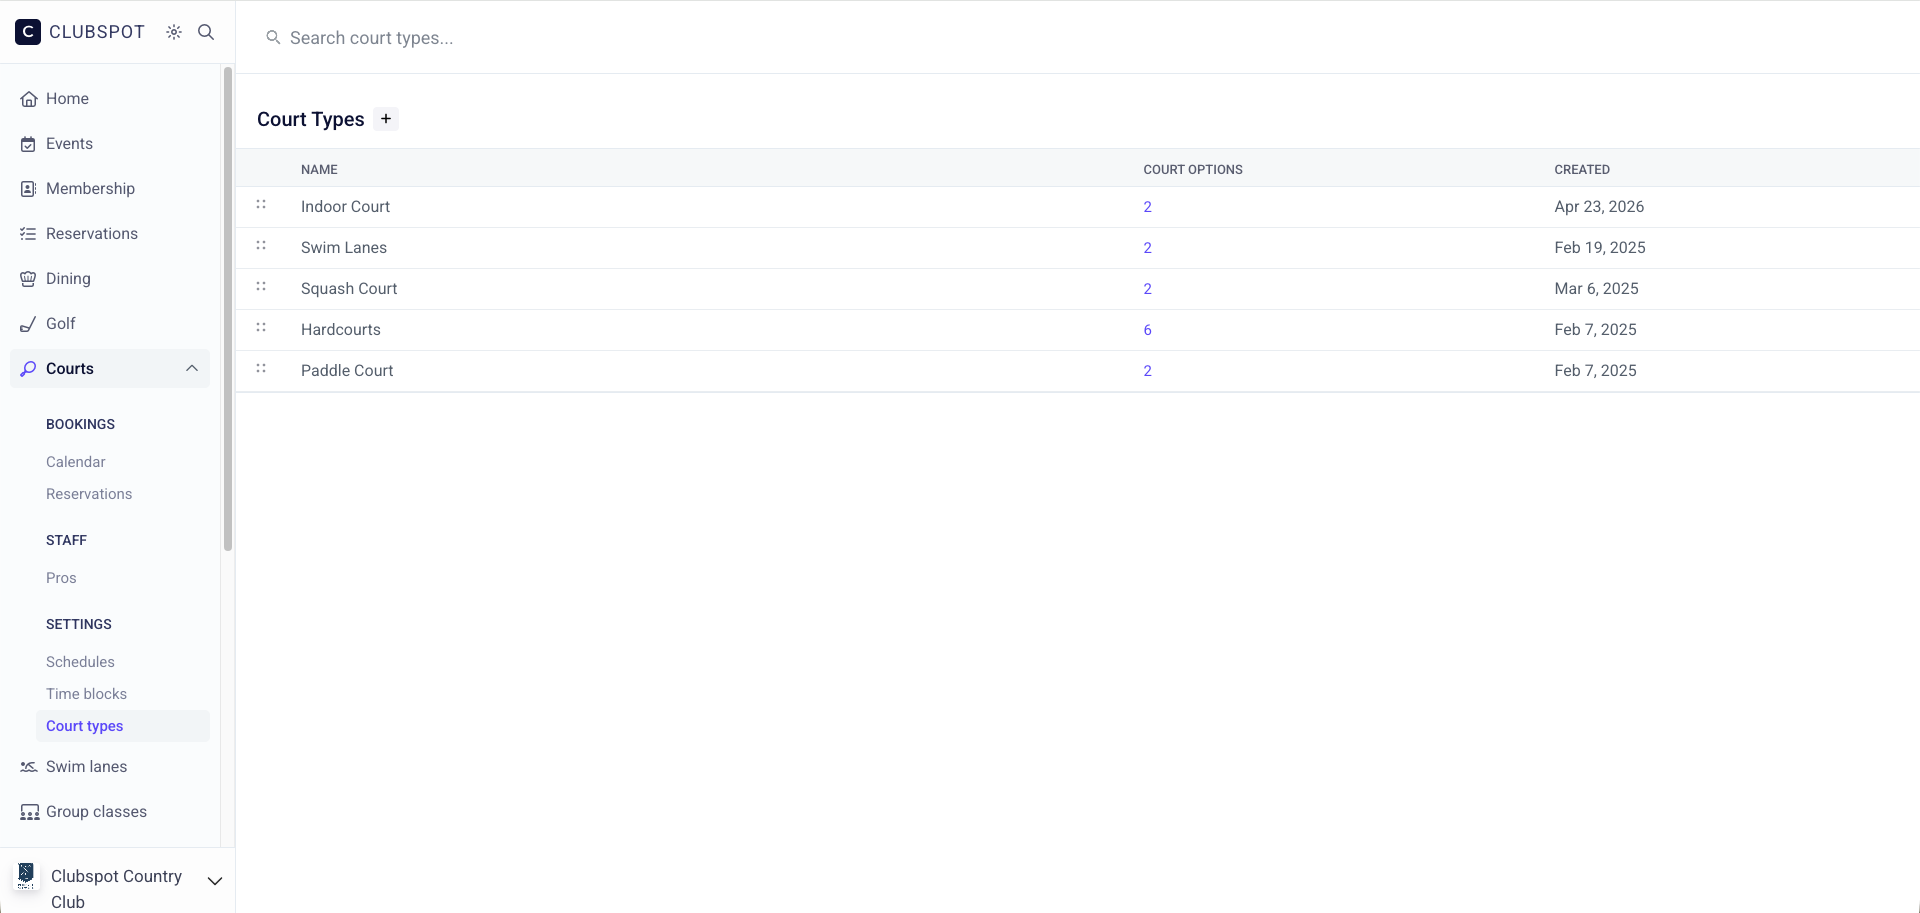
2. Create Options
If your club has multiple instances of one court type (Squash Court #1, Squash Court #2, etc), then you’ll want to utilize the Product Options settings. Navigate to the “Options” Tab at the top of the Reservable Product page and add one option for each of the courts available for booking. These court numbers can be rearranged by dragging them up and down in the options list.
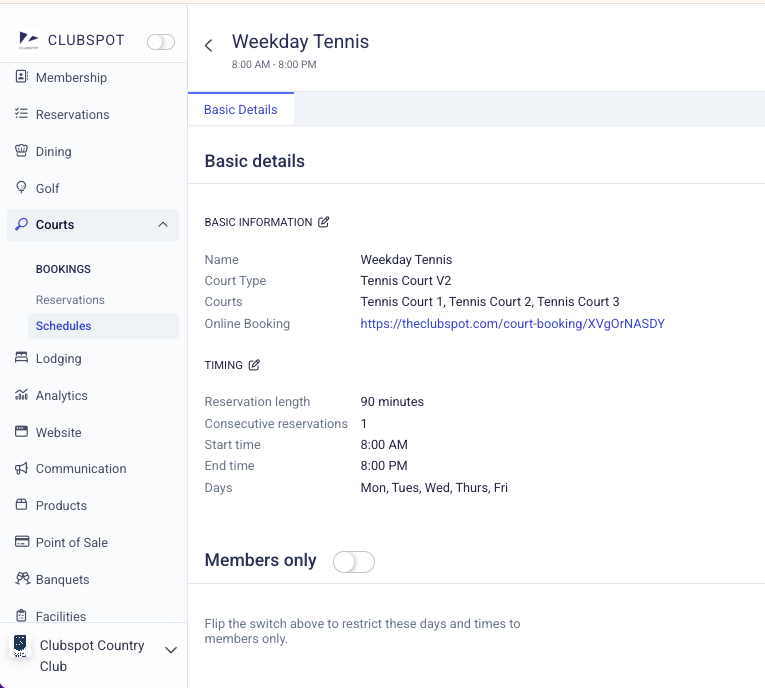
3. Create Court Schedule
One or more schedules can be created for each type of court. This allows you to support various booking rules based on the day of the week or the court number. If you choose to restrict the court booking to only members, you can indicate a particular membership category that can access the court during this schedule. If you require that members pay an extra fee to access courts, you can also restrict their access by membership add-on. If you need the max number of players on the court schedule to be a number other than 4, reach out to support@theclubspot.com to let us know!
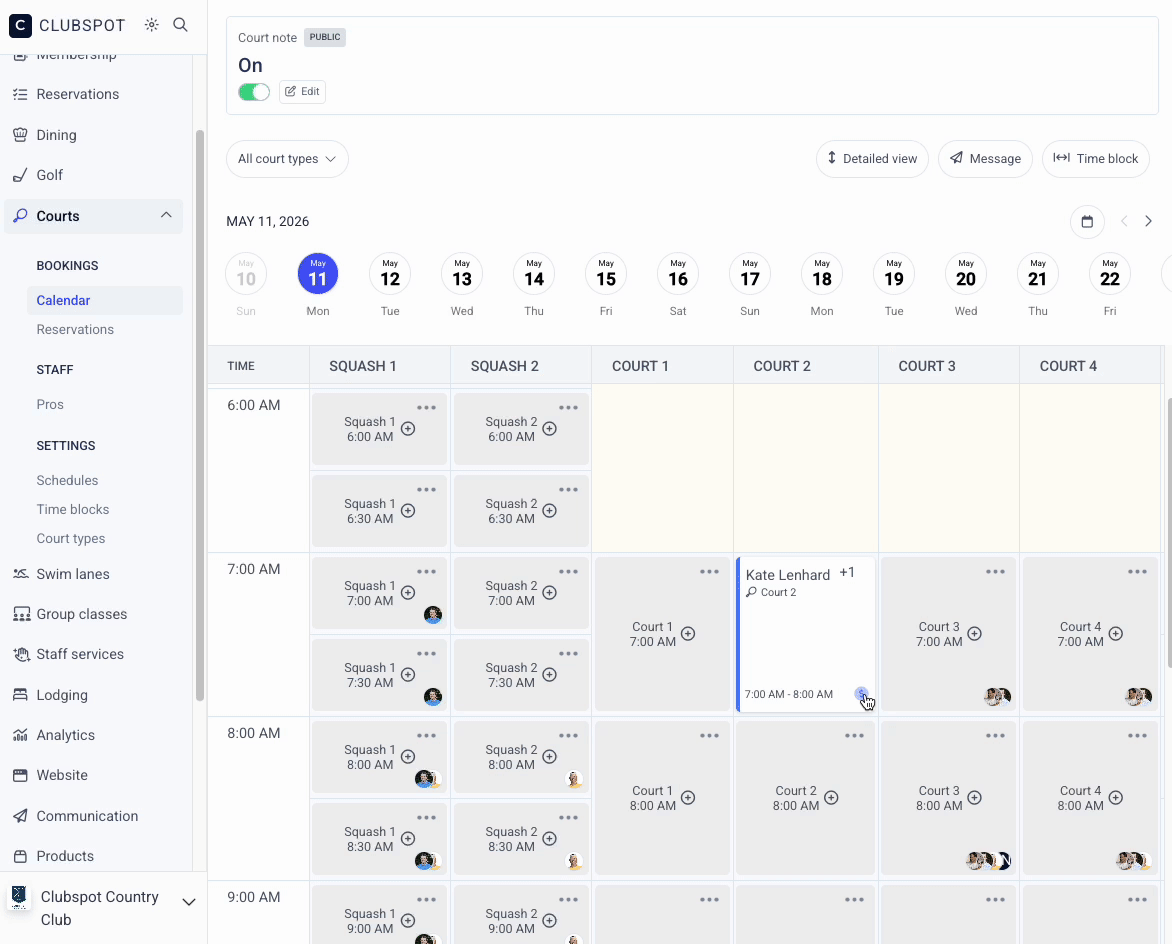
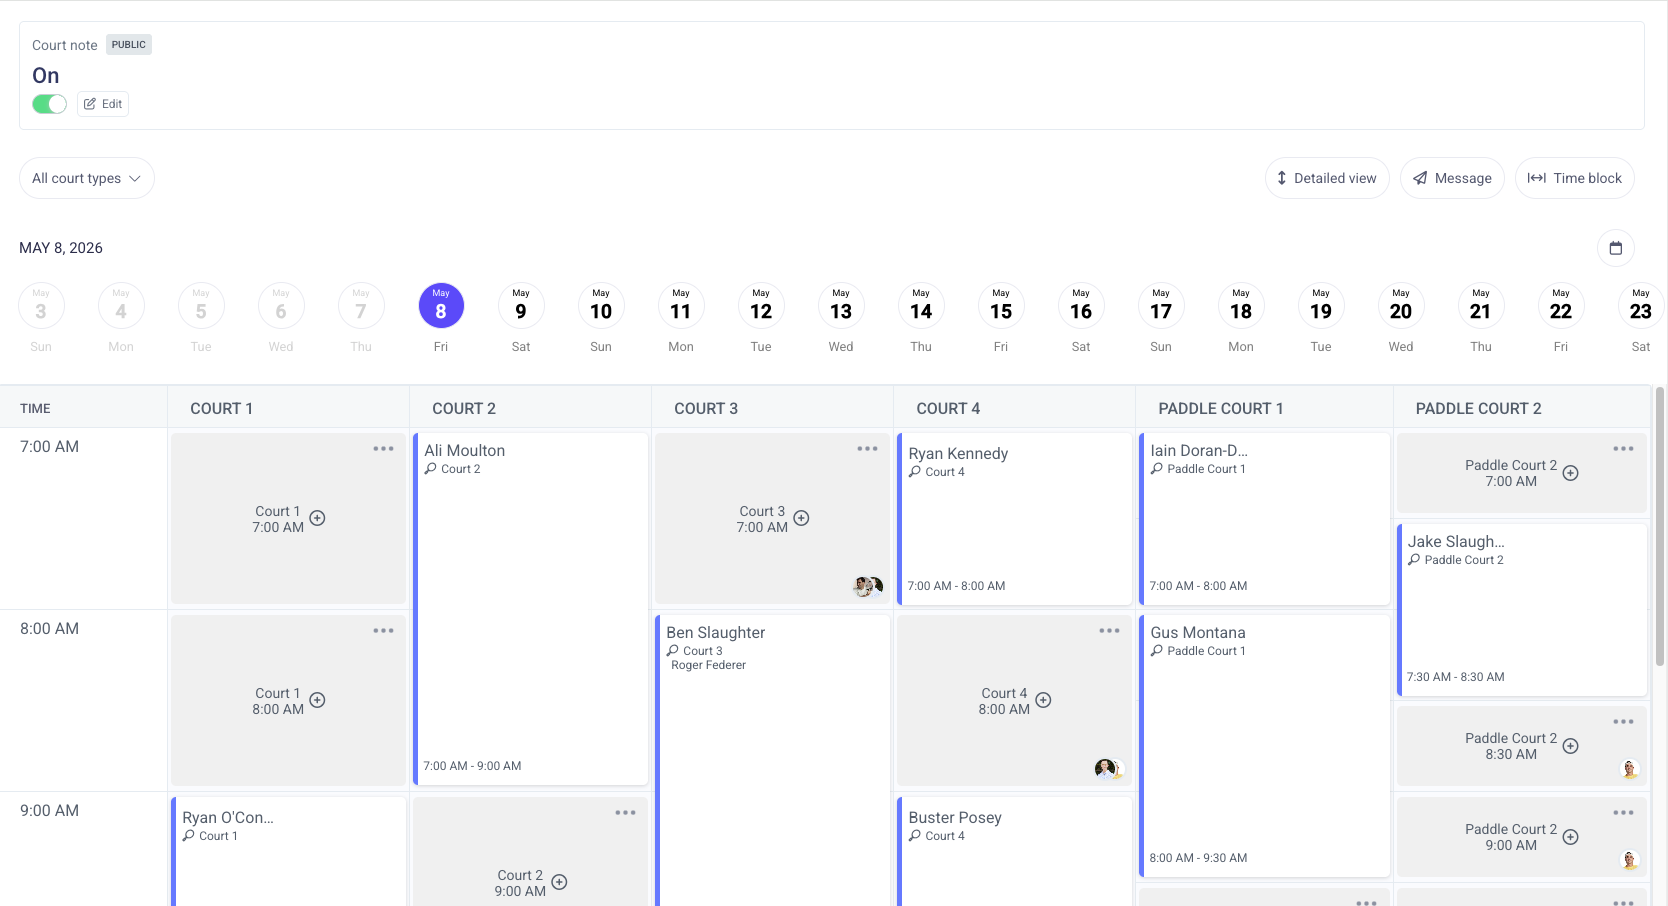
Using the Courts Calendar
Reservation Calendar
This calendar shows every court and its bookable time slots based on your predetermined court schedule. If a court is not included in a given schedule, it will appear with a blank yellow block. If a court has a time block, it will appear with a greyed-out block. The filter at the top of the page will allow you to simplify the view to see only select court types.
Create a Booking
From the Courts > Reservations section in your dashboard, you’ll find the visual representation of your bookings on the Calendar (a list version can still be found and exported on the Reservations > Reservations tab of the dashboard. To book a court, use the date circles or the calendar icon to select the right date. Then find the intersection of the right court and date, and click on the empty tile. You’ll be prompted to select a guest or a member.
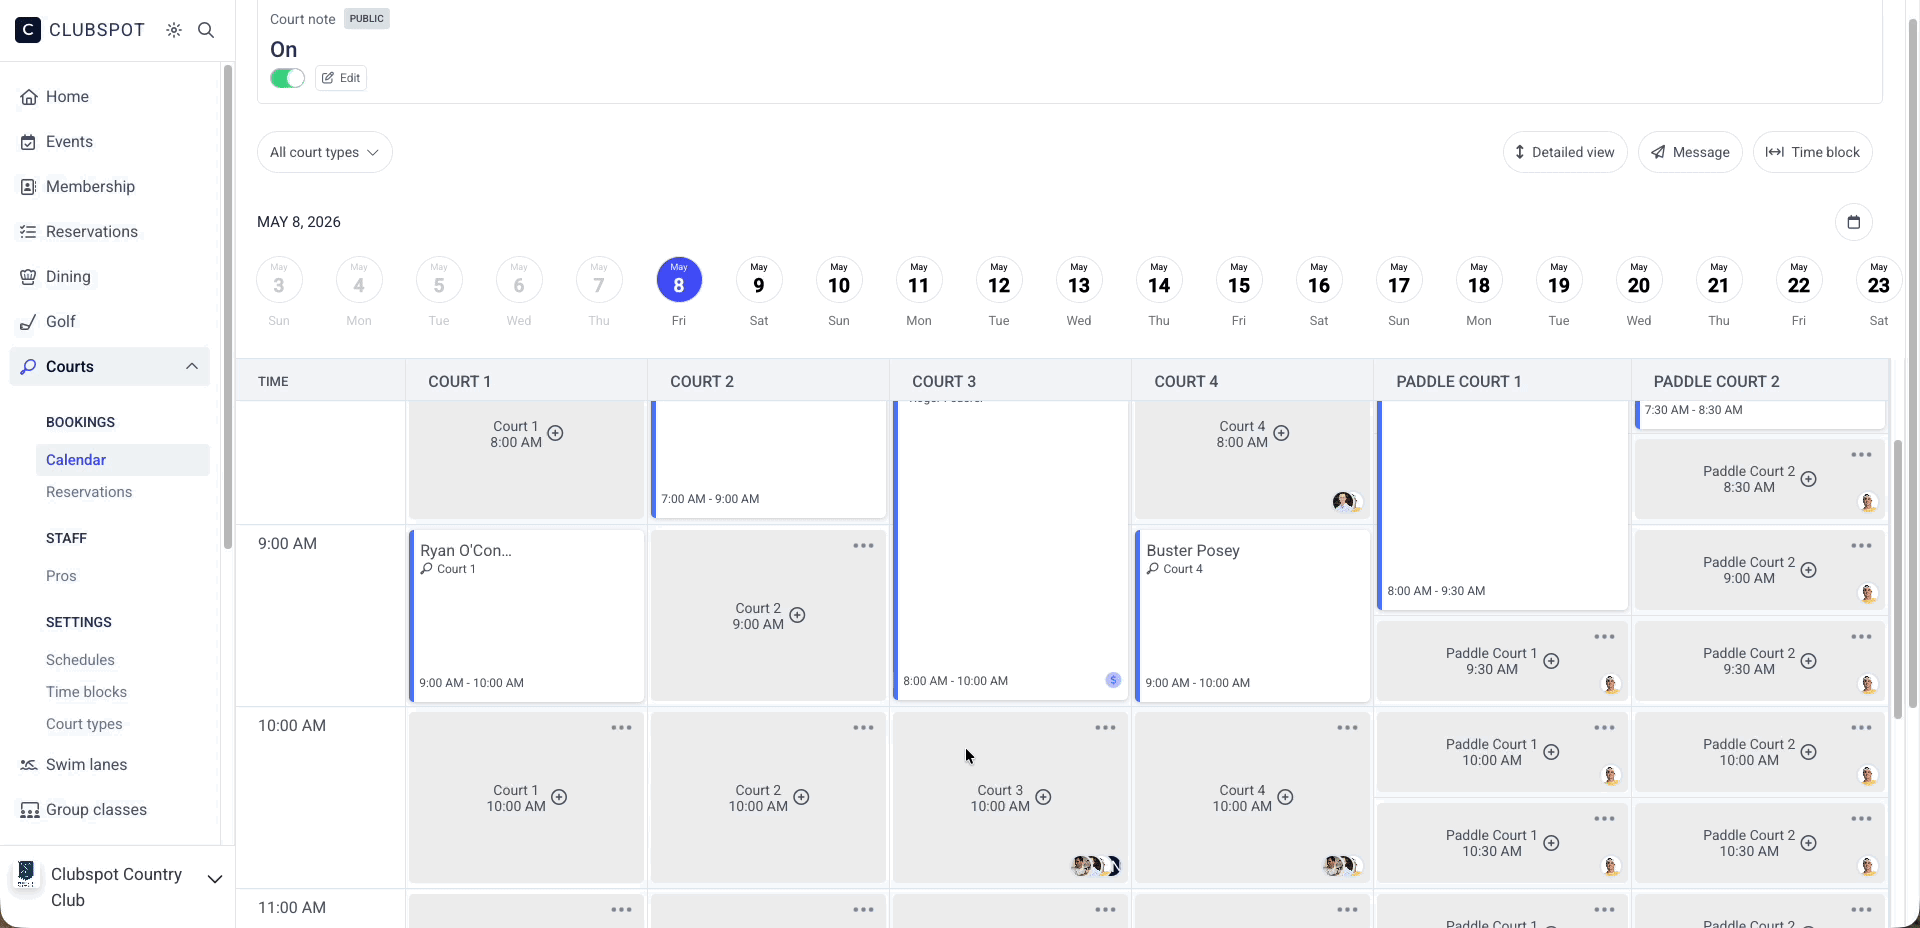
Manage Reservation
Clicking on any booking will allow you to view registration details. This is where you can see the details of the booking, add notes, and check the player in. You’ll also find a Message icon on this page. This is used to send a message to the players specifically on this booking — perhaps alerting them of an issue with their court. If you’d like to message everyone with a booking for the day, you can use the Message button at the upper right of the court calendar — perhaps alerting them to a cancellation due to weather.
Time Blocks
Use the Time Block button in the upper right-hand corner of the screen to create a time block. The block can be applied to one or more court options, regardless of the type of court. Any courts that are blocked will appear with a lock icon on the reservation calendar. If you need to block a single session, you can do so by clicking on the ellipsis
If your court is divided into sections (i.e., two pickleball courts on one tennis court), Clubspot supports the ability to time block just one of those sub-sections. When creating time blocks, you will see a warning if the time block conflicts with an existing booking
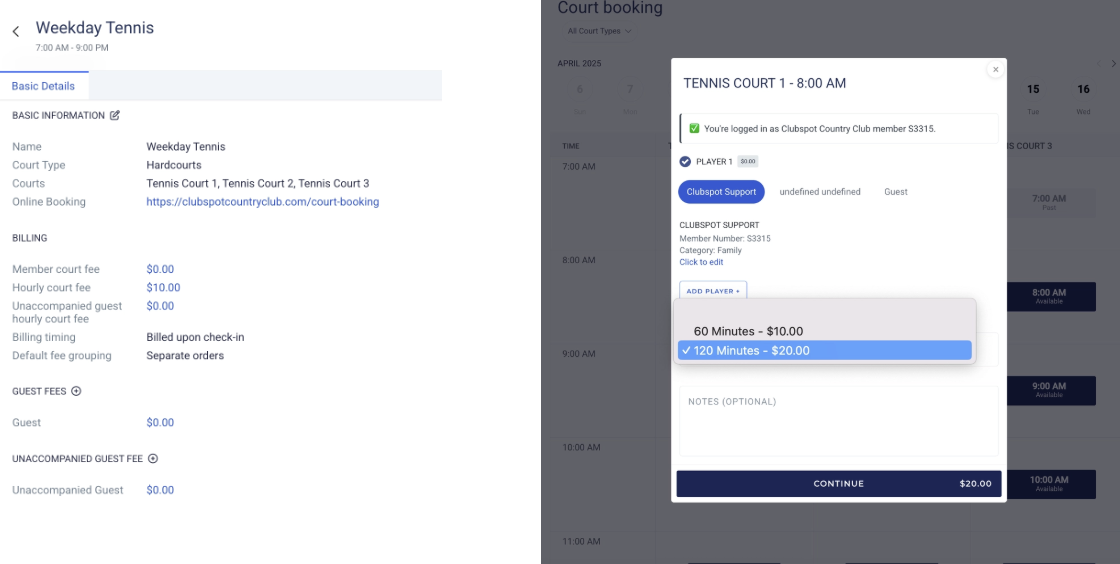
Billing
Court schedules can be programmed with a member fee, an unaccompanied guest fee, and any number of custom guest fees. These fees are charged per person per court booking.
Alternatively, court schedules can also be programmed with an hourly court fee. This rate will be charged incrementally based on the duration of the court booking:
On the court sheet, we support deferred billing. As an admin, you’ll see that each reservation with a dollar value as a result of fees or add-ons will be signified by a little dollar sign icon. If the icon is blue, the order is unpaid, and it needs to be charged to a customer. To do so, click on the blue $ sign to open up a side panel and close the order out to a payment method. Once paid, the $ sign will turn green to signify that the order has been closed.